
Kitchen floor tile installation
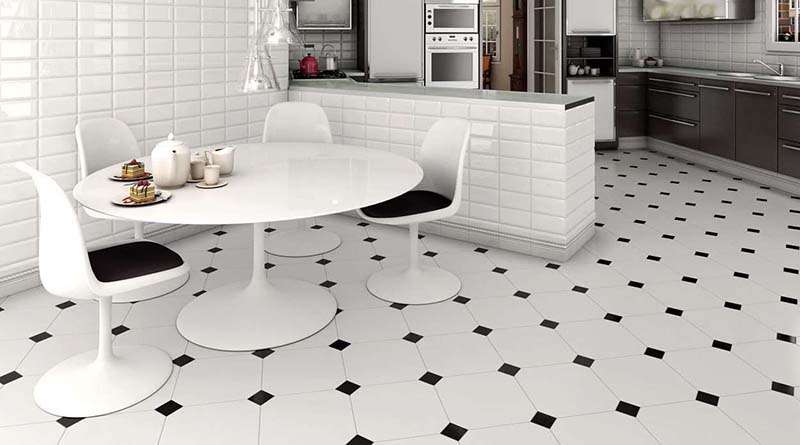
Kitchen floor tile installation – basic recommendations for organizing the process. First of all, you should decide on the tile that you will lay. When choosing a tile, it is important to consider not only its appearance, but also its performance properties. Durable and wear-resistant tiles that are resistant to moisture and chemical detergents are best suited for the kitchen.


Also pay attention to the size of the tile. Large tiles visually expand the space and create a more monolithic floor. Small tiles or mosaics add dynamics to the interior and allow you to zone the kitchen space. However, when choosing small tiles, it is worth considering that laying them will take more time and effort.
The result of laying the tiles will depend on how well the floor surface is prepared. The floor must be level, clean and dry. If there is an old covering on the floor (laminate, linoleum or old tiles), it must be removed. After that, the floor should be leveled – this can be done using a self-leveling mixture or concrete screed.
If you are using a self-leveling mixture, carefully follow the instructions on the package. The mixture should be spread evenly over the surface and allowed to dry. In the case of a concrete screed, it is important to carefully level out any unevenness and allow the coating to dry completely before laying the tiles. This will ensure proper adhesion of the tiles to the base and prevent cracks and chips in the future.

Kitchen floor tile installation: step-by-step instructions
- Marking the floor.
Marking the floor is a key step that will determine the evenness and symmetry of the tile laying. Find the center of the kitchen and draw two intersecting lines: one along the longest wall, the other along the shortest. Start laying the tiles from the center to avoid shifting rows and achieve symmetry. - Preparing the adhesive and applying to the floor.
Mix the tile adhesive according to the instructions on the package. It is important to achieve a uniform consistency without lumps. Apply the adhesive to a small area of the floor using a notched trowel. Do not cover too much of the surface with adhesive at once, as the adhesive may dry before you have time to lay the tiles. The thickness of the adhesive layer should correspond to the size of the tile: for large tiles, the layer should be thicker, and for small tiles, it should be thinner. After applying the adhesive, run a notched trowel over the surface to create a relief for better adhesion of the tile to the base. - Start laying the tiles from the center.
Start laying from the center of the room, following the markings. Place the first tile on the adhesive, press lightly and rock it from side to side so that it sticks well. Immediately check the evenness of the installation with a level. If necessary, adjust the position of the tile before the adhesive sets. - Forming the seams.
To create even seams between the tiles, use plastic crosses. They will help maintain the same distance between the tiles and form neat seams. Install crosses at each joint to achieve an even pattern over the entire floor area. - Laying the remaining tiles.
Continue laying the tiles, moving from the center to the edges of the room. Check each row with a level to make sure the tiles are level. In places where the tiles need to be cut (for example, along walls or near pipes), use a tile cutter or grinder. After cutting, make sure the edges of the tiles are even and smooth. - Checking and adjusting.
After laying all the tiles, be sure to check the level of the floor. If there are any irregularities, adjust them until the adhesive has completely dried. Also check the seams and, if necessary, level them by removing excess glue. - Grouting.
After the adhesive has completely dried (usually 24-48 hours), you can start grouting the seams. Mix the grout according to the instructions and apply it to the seams with a rubber spatula. Work at an angle so that the mixture fills all the seams and does not leave any voids.
After applying the grout, wipe the tiles with a damp sponge to remove excess and give the joints a neat appearance. It is important to do this before the grout dries completely, otherwise it will be difficult to remove.


Please tell me more about your excellent articles http://www.hairstylesvip.com